Writing unlocks a whole new world for kids—suddenly they’re leaving notes for you, creating storybooks about adventures with friends, and feeling like a grown-up as they sign their name on a library or birthday card. It’s also an essential Core Skill, one of the 5 C’s at the heart of the Begin Approach to helping kids thrive in school and life.
Most kids don’t learn to write until age 4 or 5. But it’s never too early to start developing a love for writing! Even if your child can’t yet form letters independently, you can use these pre-writing activities for preschoolers to help them become great writers.
The Short Cut
- Writing is an essential Core Skill, one of the 5 C’s that help kids thrive in school and life
- Kids learn to write in stages. They start with scribbling, progress to writing letters, invent spellings based on how words sound (“secint” instead of “second”), and eventually learn to follow conventional spelling rules
- Pre-writing activities help kids develop capabilities they’ll need to write, including fine motor skills, the ability to draw across the midline, and the understanding that marks on a page can represent real-world objects
- Parents can help by setting up activities that develop finger dexterity, encourage kids to use crayons and pencils, and introduce kids to forming letters
Stages of Writing

Before you start working on pre-writing activities with your child, it’s important to understand the stages of writing development. This will help you choose appropriate activities for your child’s current level.
The Preliterate Stage
The earliest stage of writing development is known as the preliterate stage. At this point, children are just beginning to experiment with making marks on paper or scribbling. They are not yet trying to form letters or numbers.
The Emergent Stage
The next stage is known as the emergent stage. While in this writing stage, children start to understand that marks on paper can represent objects in the world. They experiment with making different marks and begin forming simple shapes independently.
During the emergent stage, you might start recognizing more letters on your child’s paper. Continue to encourage them as they work hard to develop their writing skills.
The Transitional Stage
Next, your child will enter the transitional stage. Here, they begin to use their knowledge of letters and sounds to spell words phonetically. This invented spelling is often creative and not always accurate, but it’s an essential milestone in your child’s writing development.
The Fluent Stage
Finally, they will reach the fluent stage. Of course, they won’t know the correct spelling for every word they write, but they’ll begin using more conventional writing rules.
What are Pre-Writing Activities?
Now that you know more about what to expect at each developmental stage of writing, you can use pre-writing activities to support your child’s growth in this area.
Put simply, pre-writing activities include any activity that helps children practice the skills they will need for writing. They lay the foundation for future writing success by helping children:
- Develop hand-eye coordination
- Improve fine motor skills
- Become comfortable crossing the midline
- Develop visual perceptual skills
- Understand that marks on a page can represent objects in the world
- Experiment with using tools and their fingers to make different kinds of marks
How to Encourage Writing Success

Keep the below tips in mind to set your child up for success with pre-writing activities.
First, start with simple activities and gradually increase the difficulty as your child masters each one. You don’t want them to get frustrated by a game that’s too hard.
Next, choose activities that are interesting to your child. You want them to see writing as something fun, not a tedious chore.
Then, focus on the positive. Don’t point out all of the mistakes they make. Instead, celebrate their successes. This way, they start to see themselves as a good writer.
Finally, be patient. Learning to write takes time and practice!
7 Fun Pre-Writing Activities
There are endless possibilities when it comes to pre-writing activities for preschoolers. Here are just a few of our favorites.
1. Pom-Poms and Clothespins
Writing requires fine motor skills and finger dexterity. This game helps your child practice both.
What You’ll Need:
- 12 small pom-poms
- A bowl
- Muffin tin with 12 holes
- A clothespin
What to Do:
Put the pom-poms into the bowl. Set the muffin tin and the clothespin nearby.
Ask your child to use the clothespin to transfer the pom-poms to an empty hole in the muffin tin. You might need to demonstrate at first to ensure they figure out the right way to hold the clothespin without getting pinched.
Have them continue moving pom-poms one at a time until they fill each hole. Then, ask them to put the fuzzy balls back into the bowl.
2. Dot Pictures
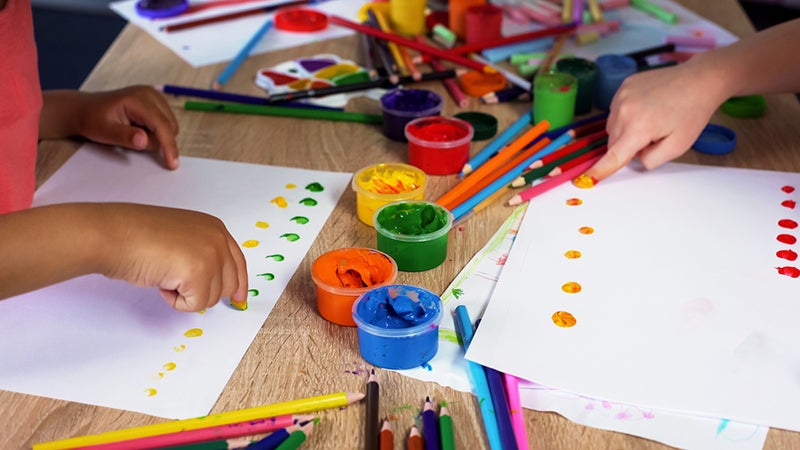
Your child can make a beautiful picture using just their fingertips and some paint!
What You’ll Need:
- Finger paint
- A piece of paper
What to Do:
Let your child dip their finger into the paint and then dot it onto their paper. They can make any kind of design they want, whether it’s a picture of a flower or just a bunch of dots in different colors.
They can experiment with new ways of making dots, such as using the sides of their fingers or making big and small dots. They can also see what happens when they mix different colors of paint.
When the painting is dry, ask your child to tell you about what they painted. This step helps them realize that the marks they created have meaning and may even tell a story.
3. Drawing in Shaving Cream
Let your child practice making different lines and shapes with this fun activity.
What You’ll Need:
- Shaving cream
- A large, flat surface (such as a cookie sheet)
What to Do:
Spray a glob of shaving cream onto the surface you’re using. Then, ask your child to spread it, creating a thin layer across the surface. Next, show them how you can use a finger to create lines and shapes in the cream.
They can practice making straight lines, curved lines, zigzags, circles, and more. Each type of line is essential for writing since they’re used to form letters.
When your child finishes drawing, ask them to use a finger to trace one line they made. Tracing helps them better understand the concept of a line and is an important skill for learning to write letters in the future.
4. Rainbow Lines

Crossing the midline is an essential part of learning to write. Encourage your child to practice this range of motion by drawing rainbows.
What You’ll Need:
- A large piece of paper
- Tape
- Two stickers
- A pencil
- Crayons or colored pencils in all the colors of the rainbow
What to Do:
Put one sticker near one edge of the paper. Then, use the pencil to draw a soft arch from the sticker to the other side of the paper. Finally, place the remaining sticker at the end of your line. The stickers represent your child’s start and end points.
Next, tape the paper to a wall so your child can stand and draw. Show them how to use a crayon or colored pencil to trace the arch and create a rainbow. Remind them to start at the left sticker and end at the right one.
Once they finish their first line, have them try using a different color. After that, they can keep going until they’ve added arches in all the rainbow colors.
5. Copycat
Being able to copy simple shapes helps your child pay attention to details. Like many writing games, this one also works on fine motor skills.
What You’ll Need:
- A shallow tray with sides on it
- Salt or sand
What to Do:
Note: Make sure to keep an eye on your child during this activity so they don’t try to eat the salt or sand.
Pour a thin layer of salt or sand into the tray. (If you make it too thick, your child won’t be able to see the lines they’re creating).
Using your finger, draw a line straight down the middle of the sand to divide it in half. You now have two separate drawing spaces — one for your child and one for you.
Ask them to draw something on their half of the board. Then, try to recreate what they drew on your half of the board. When you finish, ask your child to compare the two pictures and look for differences.
If they want, you can create a drawing for them to try to copy. However, you’ll want to keep it super simple at first. Otherwise, they might get frustrated.
6. Play Dough Seek and Find
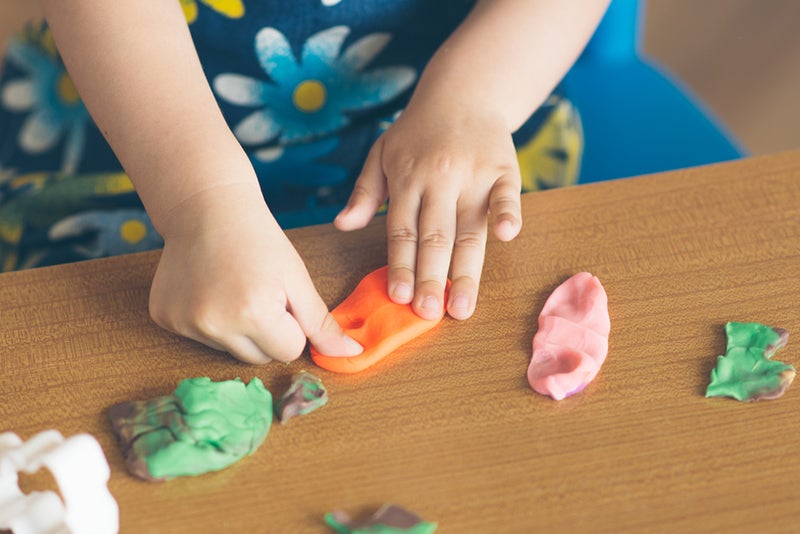
Can your child use their fine motor skills to uncover the hidden object in the ball of play dough? Let’s find out!
What You’ll Need:
- A ball of play dough
- A small object, such as a button or a magnetic letter
What to Do:
Show your child how to flatten the ball of play dough into a pancake. Once it’s flat, use your finger to make a small divot in the center of the play dough.
Drop the small object into the divot and then carefully fold the play dough over it, sealing it all the way around.
Now, give your child the ball of play dough and let them have at it! As they squish and squiggle the dough, encourage them to figure out where the object is hidden and use their fingers to get it out.
7. Play Dough Name Sign
With a bit of play dough, cardboard, glue, and time, your child can create a fun sign with their name!
What You’ll Need:
- A ball of play dough
- A piece of cardboard
- White glue
- An old paintbrush
- A plastic cup
What to Do:
Help your child create the letters in their name out of play dough. You might need to create a model for each letter they can copy first.
Once your child finishes the letters, set them in a safe place to dry. When everything is ready, dilute some white glue in the plastic cup with a bit of water.
Then, ask your child to brush the glue over the letters to help keep them intact. When they’re dry, add more glue to the back of each letter and stick it onto the cardboard in order. Once all the letters are added, let the sign dry completely.
Pre-Writing Activities for the Win!

The pre-writing activities above can help your child develop the skills they need for early writing success.
For even more literacy fun, check out the HOMER Explore Letters Kit. With magnetic letters, a story board, and games for your child, this kit makes learning letters, writing, and storytelling a blast!